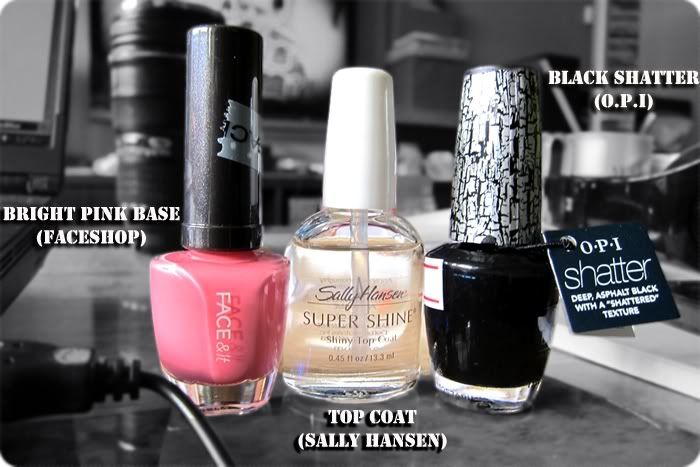
From what i've heard, there has been a massive shortage of O.P.I Black Shatter worldwide which is why my nail polish spree got postponed once agn T.T
Well, the good news is, while window-shopping at Far East Plaza yesterday, i chanced upon a random manicure shop that stores both Burlesque's Show It & Glow It (which is now OOS at the spree site as well) and Katy Perry's Black Shatter!!!!!! Bought it immediately even though it costed me $18, $7 more than the one i paid for earlier on. Definitely an impulse buy -__-"
Anyhows, spent close to 2 hours testing out the "shatter" effect. Albeit public's belief that this top coat is really easy to use, I had a hard time perfecting the skill of applying an adequate amount of the Black Shatter top coat to make sure the "shatter" effect can be seen.
What i started with...

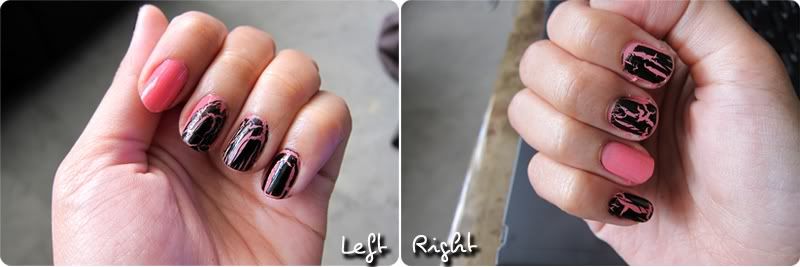
And the end results..

The shatter effect is prettier on my right hand as compared to the left right? =( I have no idea why but here are some tips based on my experience:
(1) Make sure ur base coat is COMPLETELY dry before you apply Black Shatter.
(2) Use one THICK coat of Black Shatter to go over your nails to get the best effect
(3) Black Shatter dries REALLY fast, so act quick!
(4) Without the use of a normal topcoat, your end result would be MATT-looking nails. Hence, i painted a thin coat of topcoat over my nails to get that glossy effect.
I didnt apply the Black Shatter on some of my finger nails deliberately because 10 "shattered" nails made me look really punkish while i wanted an edgy feel instead! =)
I'm gona spend a few more days experimenting with my new nail polish and hopefully there will be more pretty "shattered" nails blogpost in the future. hehehe.
On a sidenote, i have a meeting with the Professor on Thurs. Do you tink my nails are too wild? =X
Until next time~
Well, the good news is, while window-shopping at Far East Plaza yesterday, i chanced upon a random manicure shop that stores both Burlesque's Show It & Glow It (which is now OOS at the spree site as well) and Katy Perry's Black Shatter!!!!!! Bought it immediately even though it costed me $18, $7 more than the one i paid for earlier on. Definitely an impulse buy -__-"
Anyhows, spent close to 2 hours testing out the "shatter" effect. Albeit public's belief that this top coat is really easy to use, I had a hard time perfecting the skill of applying an adequate amount of the Black Shatter top coat to make sure the "shatter" effect can be seen.
What i started with...

And the end results..

The shatter effect is prettier on my right hand as compared to the left right? =( I have no idea why but here are some tips based on my experience:
(1) Make sure ur base coat is COMPLETELY dry before you apply Black Shatter.
(2) Use one THICK coat of Black Shatter to go over your nails to get the best effect
(3) Black Shatter dries REALLY fast, so act quick!
(4) Without the use of a normal topcoat, your end result would be MATT-looking nails. Hence, i painted a thin coat of topcoat over my nails to get that glossy effect.
I didnt apply the Black Shatter on some of my finger nails deliberately because 10 "shattered" nails made me look really punkish while i wanted an edgy feel instead! =)
I'm gona spend a few more days experimenting with my new nail polish and hopefully there will be more pretty "shattered" nails blogpost in the future. hehehe.
On a sidenote, i have a meeting with the Professor on Thurs. Do you tink my nails are too wild? =X
Until next time~


No comments:
Post a Comment